Installing And Deploying The Vim Connect Desktop Agent MSI
This guide provides instructions on deploying and installing Vim Connect’s Desktop Agent in various ways
- Manual installation – best for small organizations that plan to install the agent on a limited number of computers, as it can be faster to install the software manually than to automate it simply.
- Customizable Installation via command-line – a command line install is a great way to customize how the installation would look regarding UI and behavior. This way can also be used to deploy the agent via tools like GPO or any other deployment tools you might use.
- Deployment via GPO – deploy the agent via a Group Policy Object (GPO) with a scheduled task and a batch script that will contain the needed parameters the MSI file requires for installation, this method does not require restarting the endpoints.
- Troubleshooting Steps for GPO – Should you run into issues with GPO deployment, refer to these steps for troubleshooting.
Manual Installation
- Download the MSI file: https://vim.health/desktop_ecw
- Move the installation MSI file to a workstation machine and double-click the MSI to start the installation. You can also download the MSI on each workstation directly from the link above.
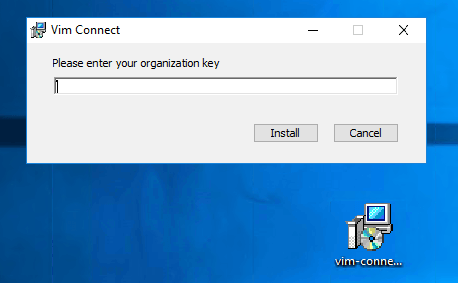
- The MSI will start installing, and you’ll be asked to enter your organization key and click Install.

- After clicking install, the agent will take a few seconds to finish installing.
- After the client finishes installing, you will see the Vim logo among the tray icons.


Customizable Installation via Command-Line
- Download the MSI file: https://vim.health/desktop_ecw
- In order to install the MSI via the command line, you will need to utilize these parameters:
1) /qn → this flag ensures the installation will be quiet and non-interactable for the user.
2) organiztion_key → your organization key.
3) RUN_ON_STARTUP → whether the agent will run after a computer restart.
*Note: this must be set to “true” unless eCW is published via Citrix, in which case it
should be set to “false”.
4) /L*V → this will generate an Installation log for troubleshooting purposes. You can change
the path to whatever you want.
Note: Setting the parameters correctly is crucial for a successful installation. Parameters can only be changed
by uninstalling the agent and reinstalling it from scratch. Example usage:msiexec /i vim-connect-ecw-1.2.48.msi /qn PRODUCT_KEY=organization_key RUN_ON_STARTUP="true" /L*V "C:\vim-connect-msi-install.log"
- In order to run the script, open CMD as administrator and navigate to the folder containing the MSI.
- Paste the command and press enter.

- After the client finishes installing, you will see the Vim logo among the tray icons.


Deployment via GPO
- Download the MSI file: https://vim.health/desktop_ecw
- Create a shared folder on a network-accessible server.
See this guide on how to create such a folder:
Creating a Network Shared Distribution - Create a .bat file with the following code and change the parameters according to your needs:
if exist "C:\Program Files\Vim Connect\vim-ehr-agent.exe" (
    echo exists
) else (
    msiexec /i "\\path\to\msi" /qn  PRODUCT_KEY=organization_key
 RUN_ON_STARTUP="true" /L*V "C:\vim-connect-msi-install.log"
)
Parameter Explanation:
1) \\path\to\msi → UNC path (network path) to the MSI file
(Do not use mapped drives, UNC only)
2) /qn → this flag ensures the installation will be quiet and non-interactable for the user.
3) ORGANIZATION_KEY → your organization key.
4) RUN_ON_STARTUP → whether the agent will run after a computer restart.
*Note: this must be set to “true” unless eCW is published via Citrix, in which case it
should be set to “false”.
5) /L*V → this will generate an Installation log for troubleshooting purposes.
You can change the path to whatever you want. - Move the MSI and the .bat file you created to the network shared folder.
- Open the Start menu, search for Run, and press Enter
- Type gpmc.msc
- The group policy management windows will open
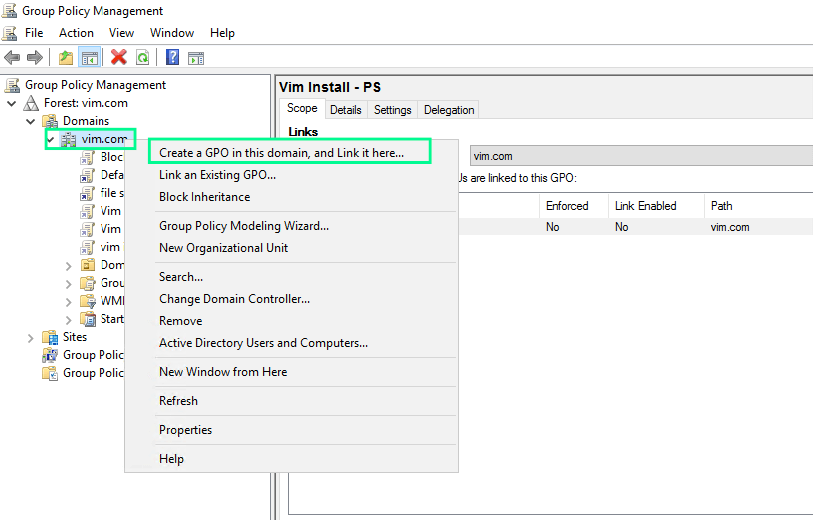
- Right-click your domain name and click Create a GPO in this domain and Link it

- Enter a name to your policy.
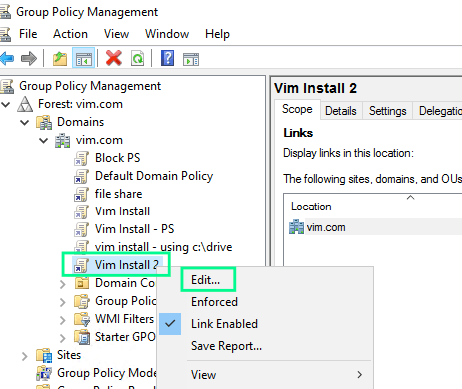
- Now right-click the policy you just created then click Edit.

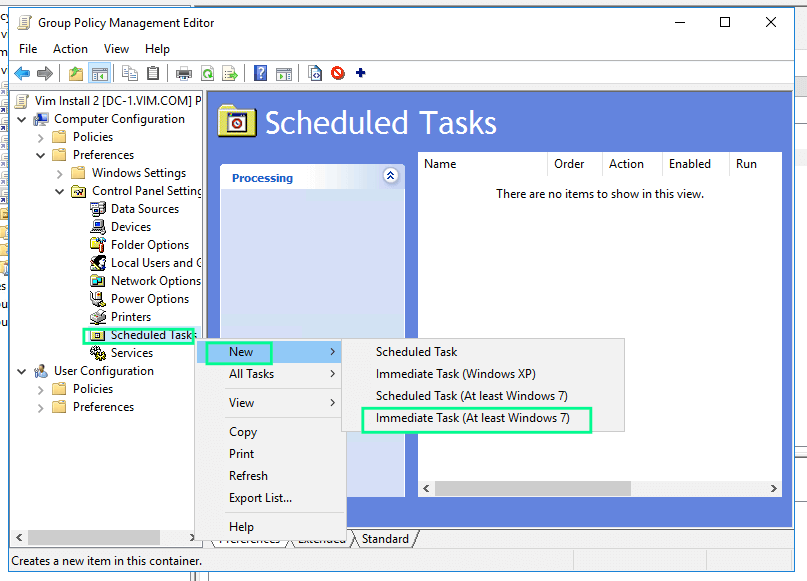
- Go to Computer Configurations → Preferences → Control Panel Settings → Scheduled Tasks.
- Right-click Scheduled Tasks → New → Immediate Task (At least Windows 7)

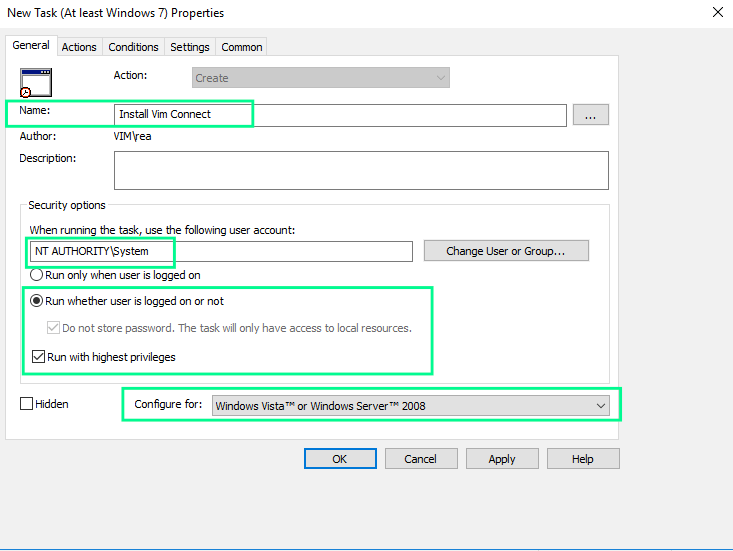
- Type a name for the scheduled task.
- Click Change User or Group → type System then click enter, make sure that you see NT AUTHORITY\System after
clicking enter. - Check Run whether the user is logged in or not.
- Check Run with the highest privileges.
- Set Configure for Windows Vista or Windows Server 2008.
- Your configurations should resemble this window:

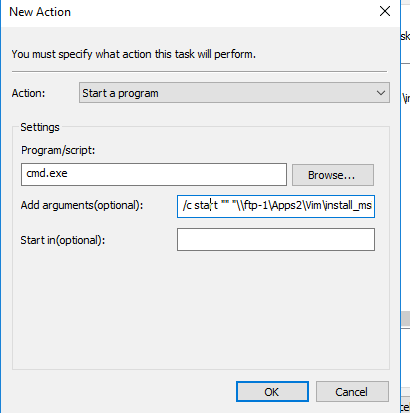
- Click the Action Tab
- Click New
- Set the following:
A. Action → Start a Program
B. Program/script → cmd.exe
C. Add Arguments → /cstart "" "\\path\to\bat_file"
*Note: replace
"\\path\to\.bat_file"with the UNC path to the batch script file and do not remove the quotes
*Your configuration should resemble the following window:

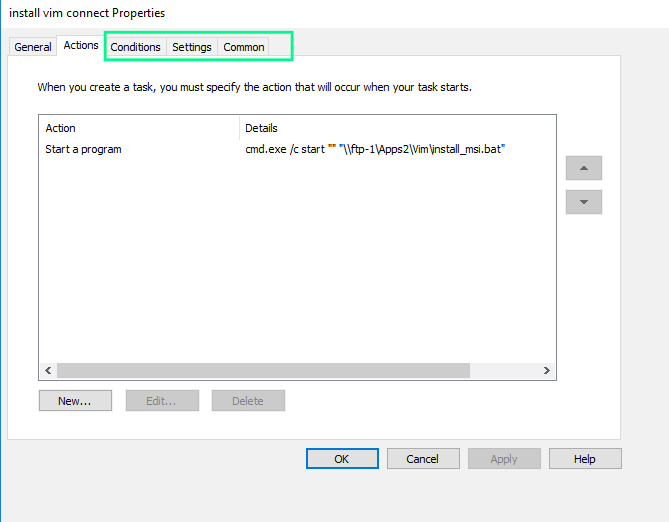
- Make sure that in the Conditions, Settings, and Common tabs nothing is configured or enabled.

- Click OK to close the window.
- On a workstation, open CMD and type gpupdate /force to force the workstation to apply the group policy.
- Alternatively, you can wait around 90 minutes for the policy to apply automatically.
- After the client finishes installing, you will see the Vim logo among the tray icons.

- If you run across any issues, you can use the following Troubleshooting Guide for GPO
deployment.