Configuring SSO for Vim ConnectWith Active Directory ADFS
Introduction:
Active Directory Federation Services (ADFS) provides SSO capabilities on top of the standard Active Directory. This guide will assist you in defining an SSO integration with Vim using your ADFS component.
Note: the following guide is written for ADFS 3.0 and 4.0.
Step 1 – Sending the ADFS Metadata URL to Vim
There are two ways to retrieve this URL – using powershell or via ADFS management console UI. Once you have the URL please send it to the Vim team.
Using powershell:
- Run powershell as administrator on your ADFS server
- Enter the following command
$mUrl = (Get-ADFSEndpoint | where Protocol -eq “Federation Metadata”).FullUrl - To see the full output type in another command
echo $mUrl.AbsoluteUri


Using ADFS management console:
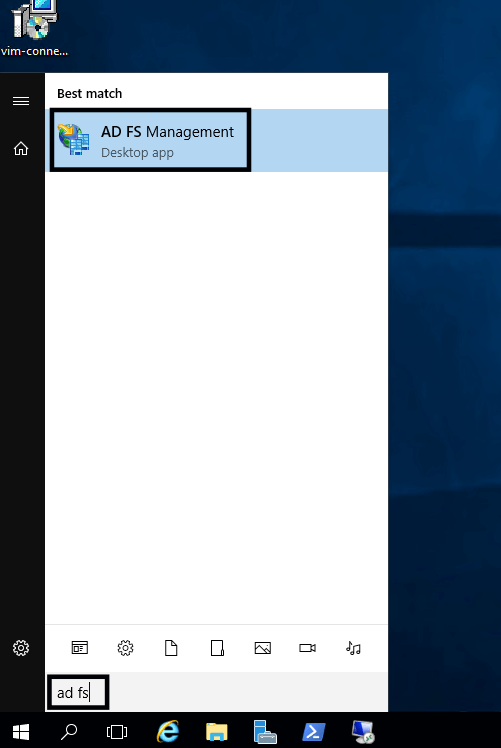
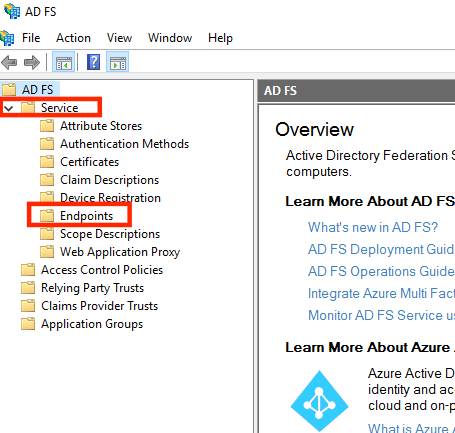
- On the Server where the ADFS role is installed, open ADFS Management window:

- Expend “Service” and then click “Endpoints”

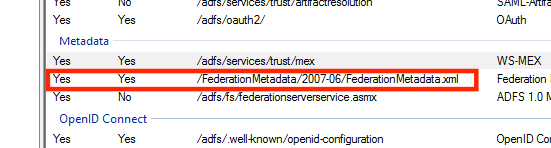
- Scroll down till you see the “Metadata” section.
You will see a URL that looks like this:
/FederationMetadata/2007-06/FederationMetadata.xml
- In order to form the URL, you will need to add the ADFS server name before the
URL you saw in step 3.
For example –
https://adfs-server-name/FederationMetadata/2007-06/FederationMetadata.xml
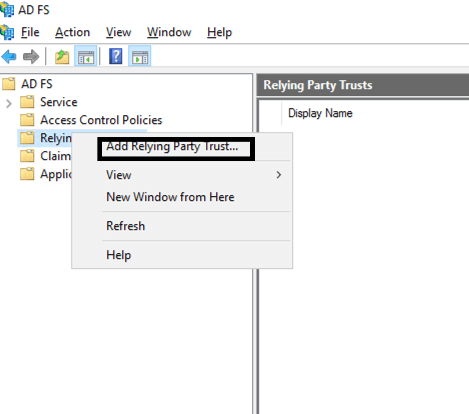
Step 2 – Add a Relying Party Trust:
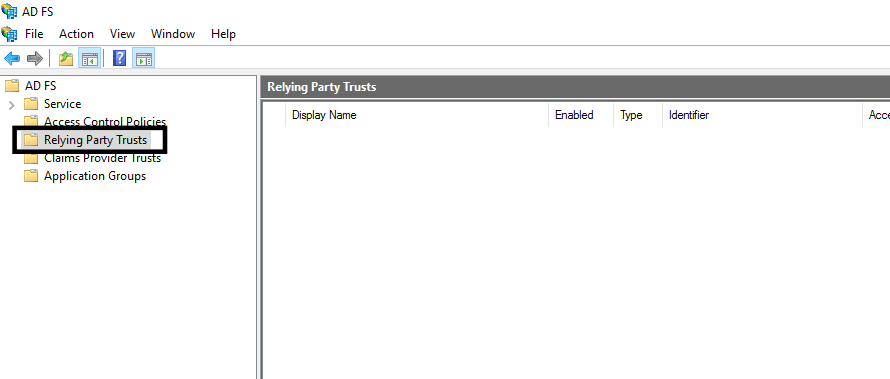
- On the Server where the ADFS role is installed, open ADFS Management window:
- In the left pane, left-click Relying Party Trust:

- Right click Relying Party Trust, and then click Add Relying Party Trust.

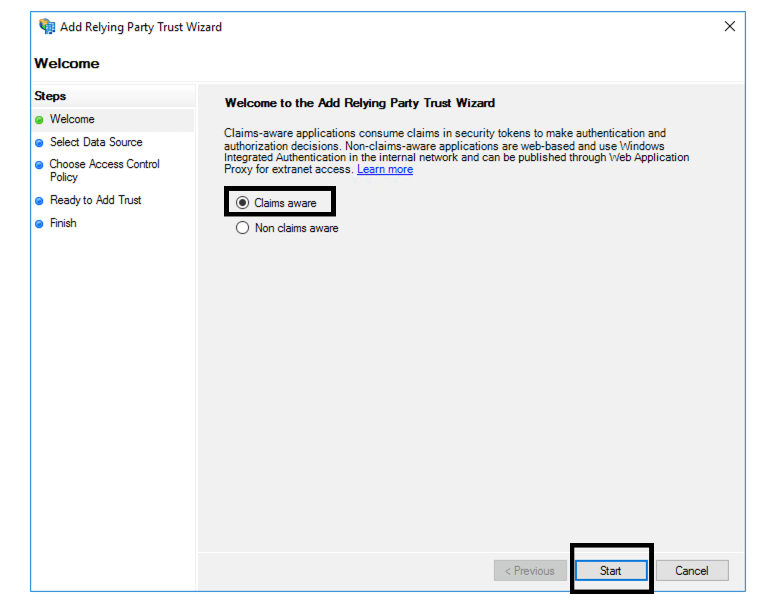
- When the Add Relying Party Trust window opens, make sure “Claims aware” is marked, then click Start

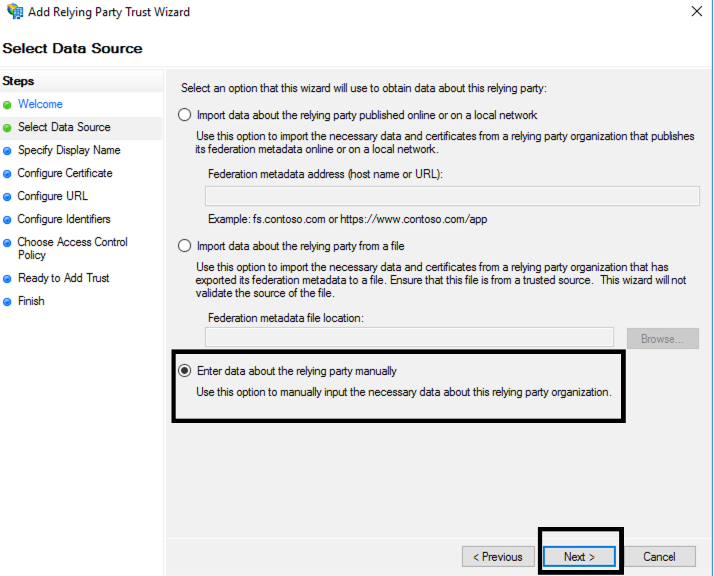
- Check “Enter data about the relying party manually” then click next:

- In the “Specify Display Name” window, Type a name as you wish (e.g. Vim Connect SSO) in the Display Name field and click next.
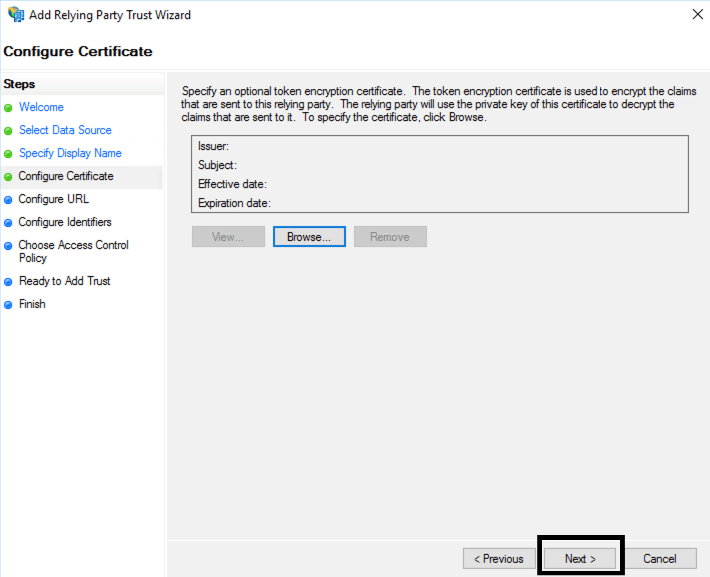
- On the Certificate page, click next to ignore it:

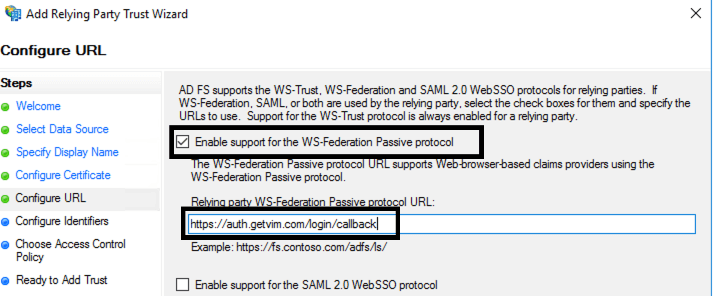
- In the Configure URL window, mark “Enable support for the WS-Federation Passive protocol” as checked. Add the following URL to the “Relying party WS-Federation Passive protocol URL” and click next:
https://auth.getvim.com/login/callback

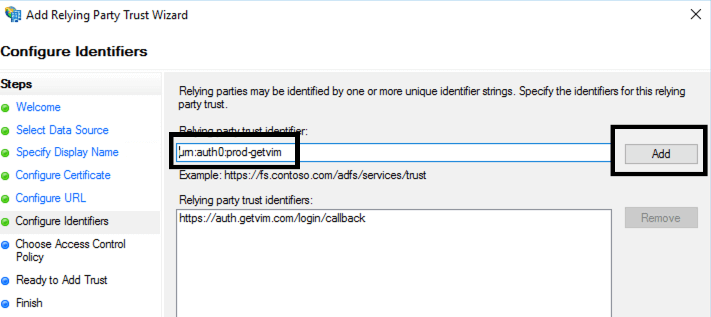
- Add Relying trust identifier by entering urn:auth0:prod-getvim into the relying party trust identifier field, and then click add and next:

- In the Choose Access Control Policy, leave all default values and click next:

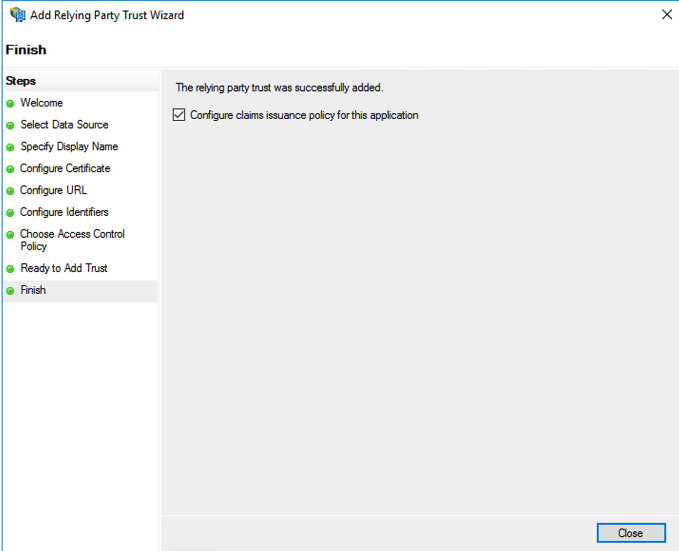
- Click next, make sure “Configure claims issuance policy for this application” is checked and then click Close.


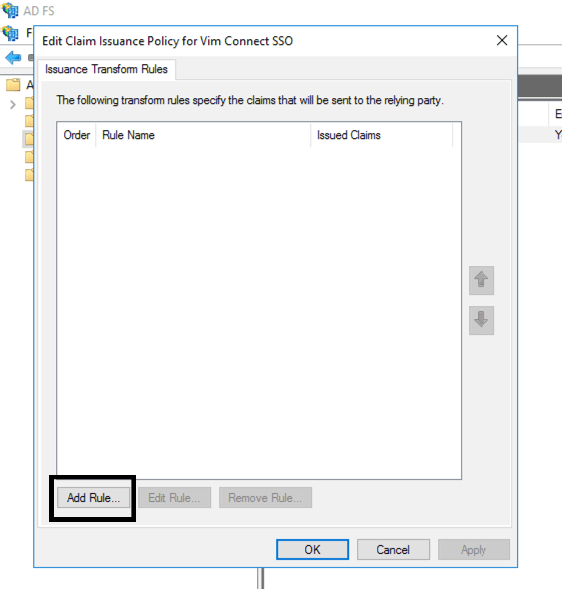
Step 3 – Creating an Edit Claims Issuance Policy:
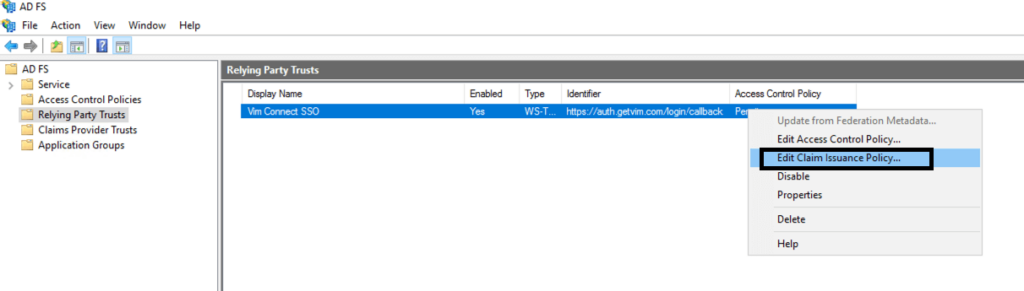
- The Edit Claims Issuance Policy window should now open automatically. If it did not, at the Relying Party Trust view, right click the relying party trust you just created and then click Edit Claims Issuance Policy:

- In the Edit Claims Issuance Policy window, click Add Rule:

- Choose Send LDAP Attributes as Claims then click next
- Give the rule a name as you wish (ex vim_sso_claims)
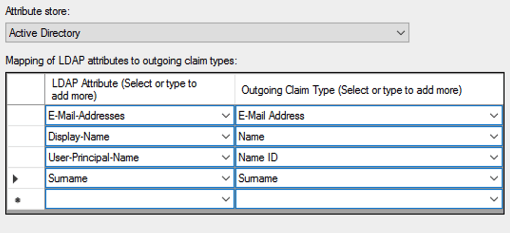
- Under Attribute Store, select Active Directory
- Under Mapping of LDAP attributes to outgoing claim types add the following attribute mappings:

- Click Finish then OK to exit the Edit Claim Issuance Policy window.
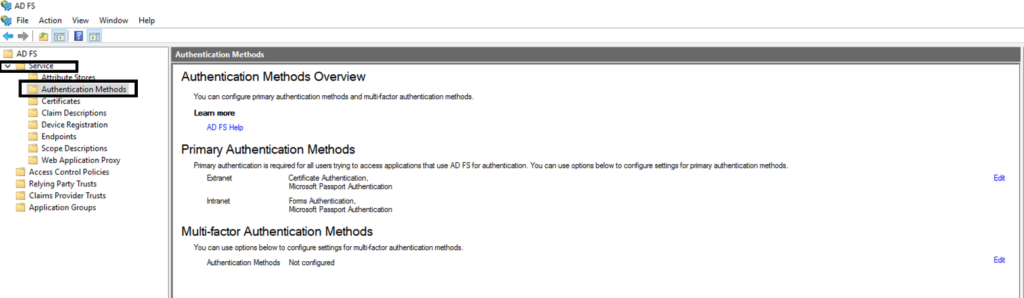
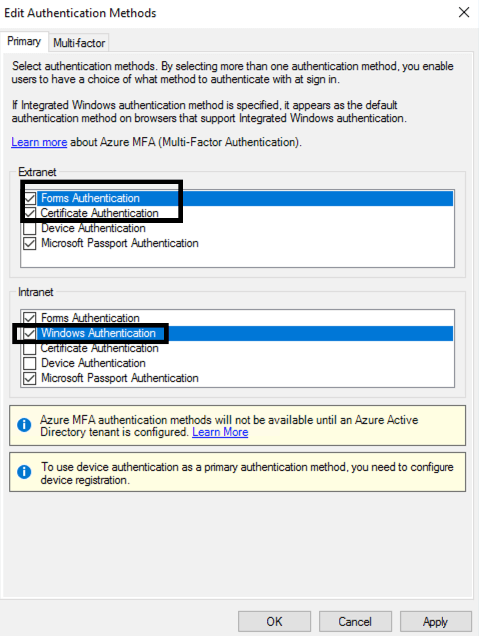
Step 3 – Enabling Integrated Windows Authentication:
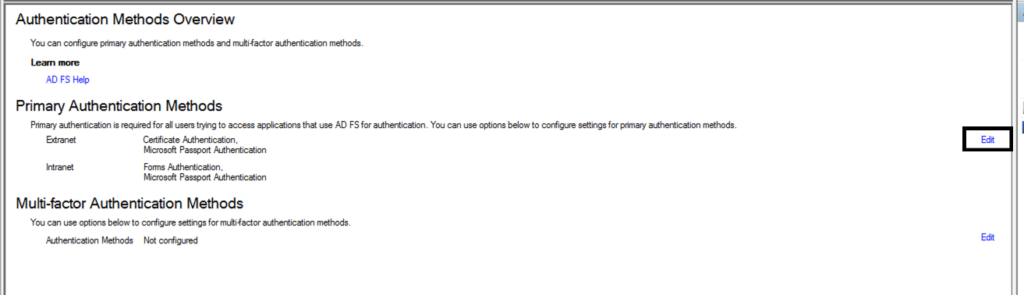
- On the AD FS management console, go to AD FS > Services > Authentication Methods.

- Under the Authentication Methods area, click Edit next to Global Settings under Primary Authentication.

- On the Primary tab, select the following:
- Under Extranet section:
- Forms Authentication
- Certificate Authentication
- Under Intranet section:
- Windows Authentication

- Under Extranet section:
- Click OK.
Step 4 – Add Chrome In ADFS As Supported Browser For Integrated Windows Authentication
- On the ADFS Server, Open Powershell as Administrator
- Paste the following command:
Set-AdfsProperties -WIASupportedUserAgents ((Get-ADFSProperties | Select -ExpandProperty WIASupportedUserAgents) + "Mozilla/4.0" + "=~Windows*NT,*Edge" + "Chrome")
You can verify the user agents were added properly by running:
Get-ADFSProperties | Select -ExpandProperty WIASupportedUserAgents

Step 5 – Add ADFS Service Name To Intranet Trusted Sites Using GPO
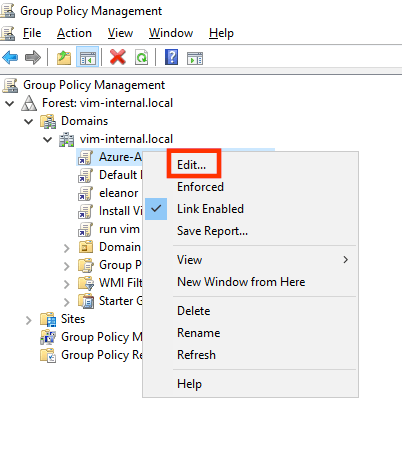
- On your GPO Server, Open Group Policy Management Editor tool.
- Create a new policy or edit a policy that applies to all of your users or a group of users.
- Right click the GPO, then click Edit:

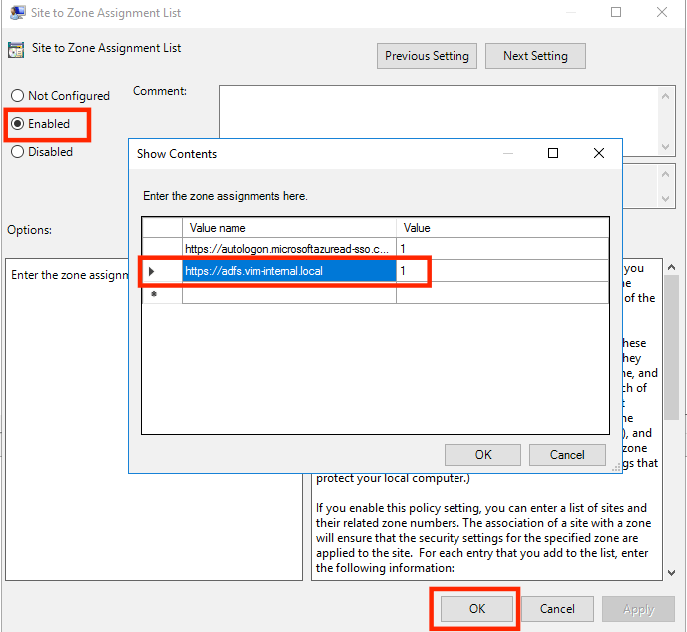
- Browse to User Configuration > Policies > Administrative Templates > Windows Components > Internet Explorer > Internet Control Panel > Security Page. Then select Site to Zone Assignment List:

- Click Enable and then enter the following values in the dialog box:
Value name: https://your-adfs-service-name
Note: Your ADFS service name can be retrieved by:
1. Opening ADFS management panel
2. Clicking “Edit Federation Service Properties” on the right pane
3. The service name will appear under the “Federation Service Name” field
Value (Data) : 1 - Select OK, and then select OK again:

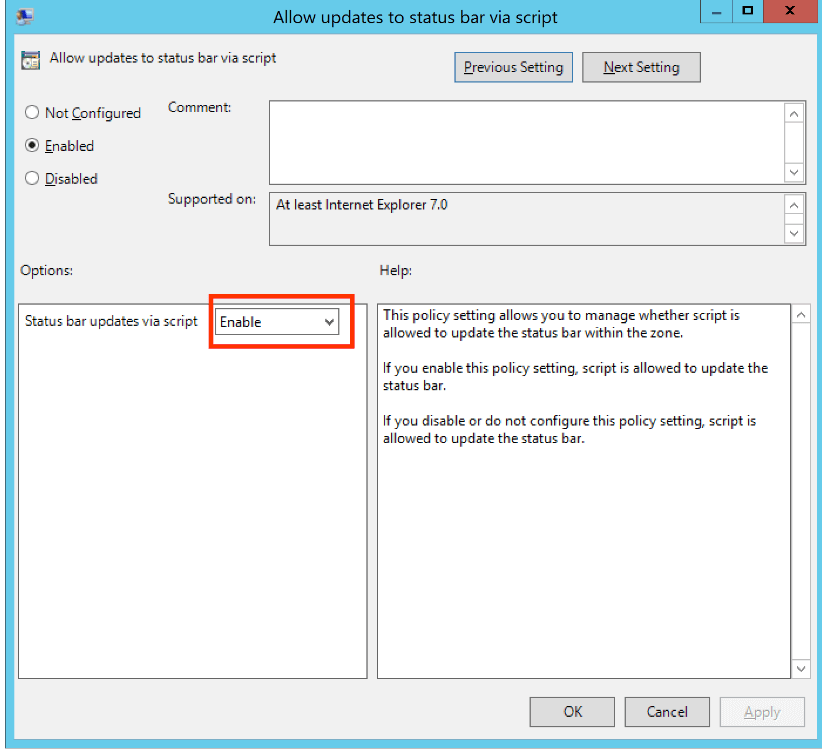
- Browse to User Configuration > Policies > Administrative Templates > Windows Components > Internet Explorer > Internet Control Panel > Security Page > Intranet Zone. Then select Allow updates to status bar via script:
- Enable the policy setting and then click OK:

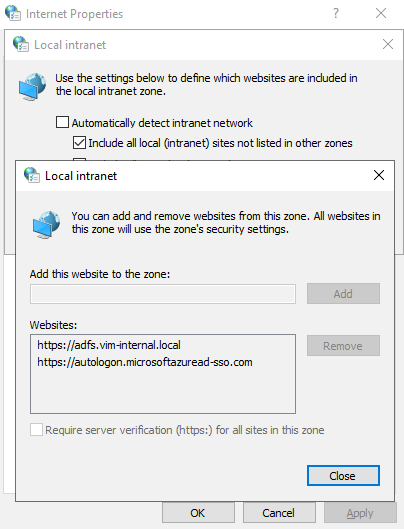
- On a test workstation, run gpupdate /force and then check if the url was added to the intranet sites by going to start menu → Internet Options → Security tab → Local Intranet → Sites → Advanced